

Can mastering latte art transform your morning espresso into a café-quality masterpiece? Discover professional barista tips for latte art techniques that bridge foundational principles, beginner patterns, advanced pours, essential equipment selection, milk frothing mastery, and home-practice strategies—all in one comprehensive guide. Whether you’re refining your microfoam, perfecting a heart or rosetta, or choosing the right grinder and steam wand, this article unifies every aspect of latte art to elevate your at-home espresso experience and support your journey with expert equipment insights from our sponsor 1st-line.com.
What Are the Essential Foundations for Mastering Latte Art?
Mastering latte art depends on a perfectly extracted espresso base, silky microfoam, and the right set of tools, ensuring each pour yields clear contrast, stable texture, and lasting visual appeal. Building these foundations promotes consistent designs and empowers you to tackle beginner and advanced patterns alike.
How Does Espresso Crema Affect Latte Art Quality?
Espresso crema is the golden-brown emulsified coffee oils that float atop a fresh shot, acting as the canvas for latte art by providing contrast and holding microfoam in place. Rich crema forms through proper grind size, tamp pressure, and water temperature, and it enhances pattern clarity while supporting the milk layer’s stability. For example, a dense crema from a precision grinder yields sharper heart outlines and smoother rosetta patterns.
Brown, C., Coffee Brewing Techniques (2023)
[Espresso Crema and Design Clarity]
Studies have shown that the quality of espresso crema significantly impacts the clarity and definition of latte art patterns. A dense and stable crema, achieved through proper grinding and extraction, provides a contrasting canvas for the microfoam, allowing designs to be more visible and hold their shape. The research highlights the importance of the espresso base in achieving the desired visual effect.
This research supports the article’s discussion on the role of espresso crema in creating effective latte art.
What Is Microfoam and Why Is It Crucial for Latte Art?
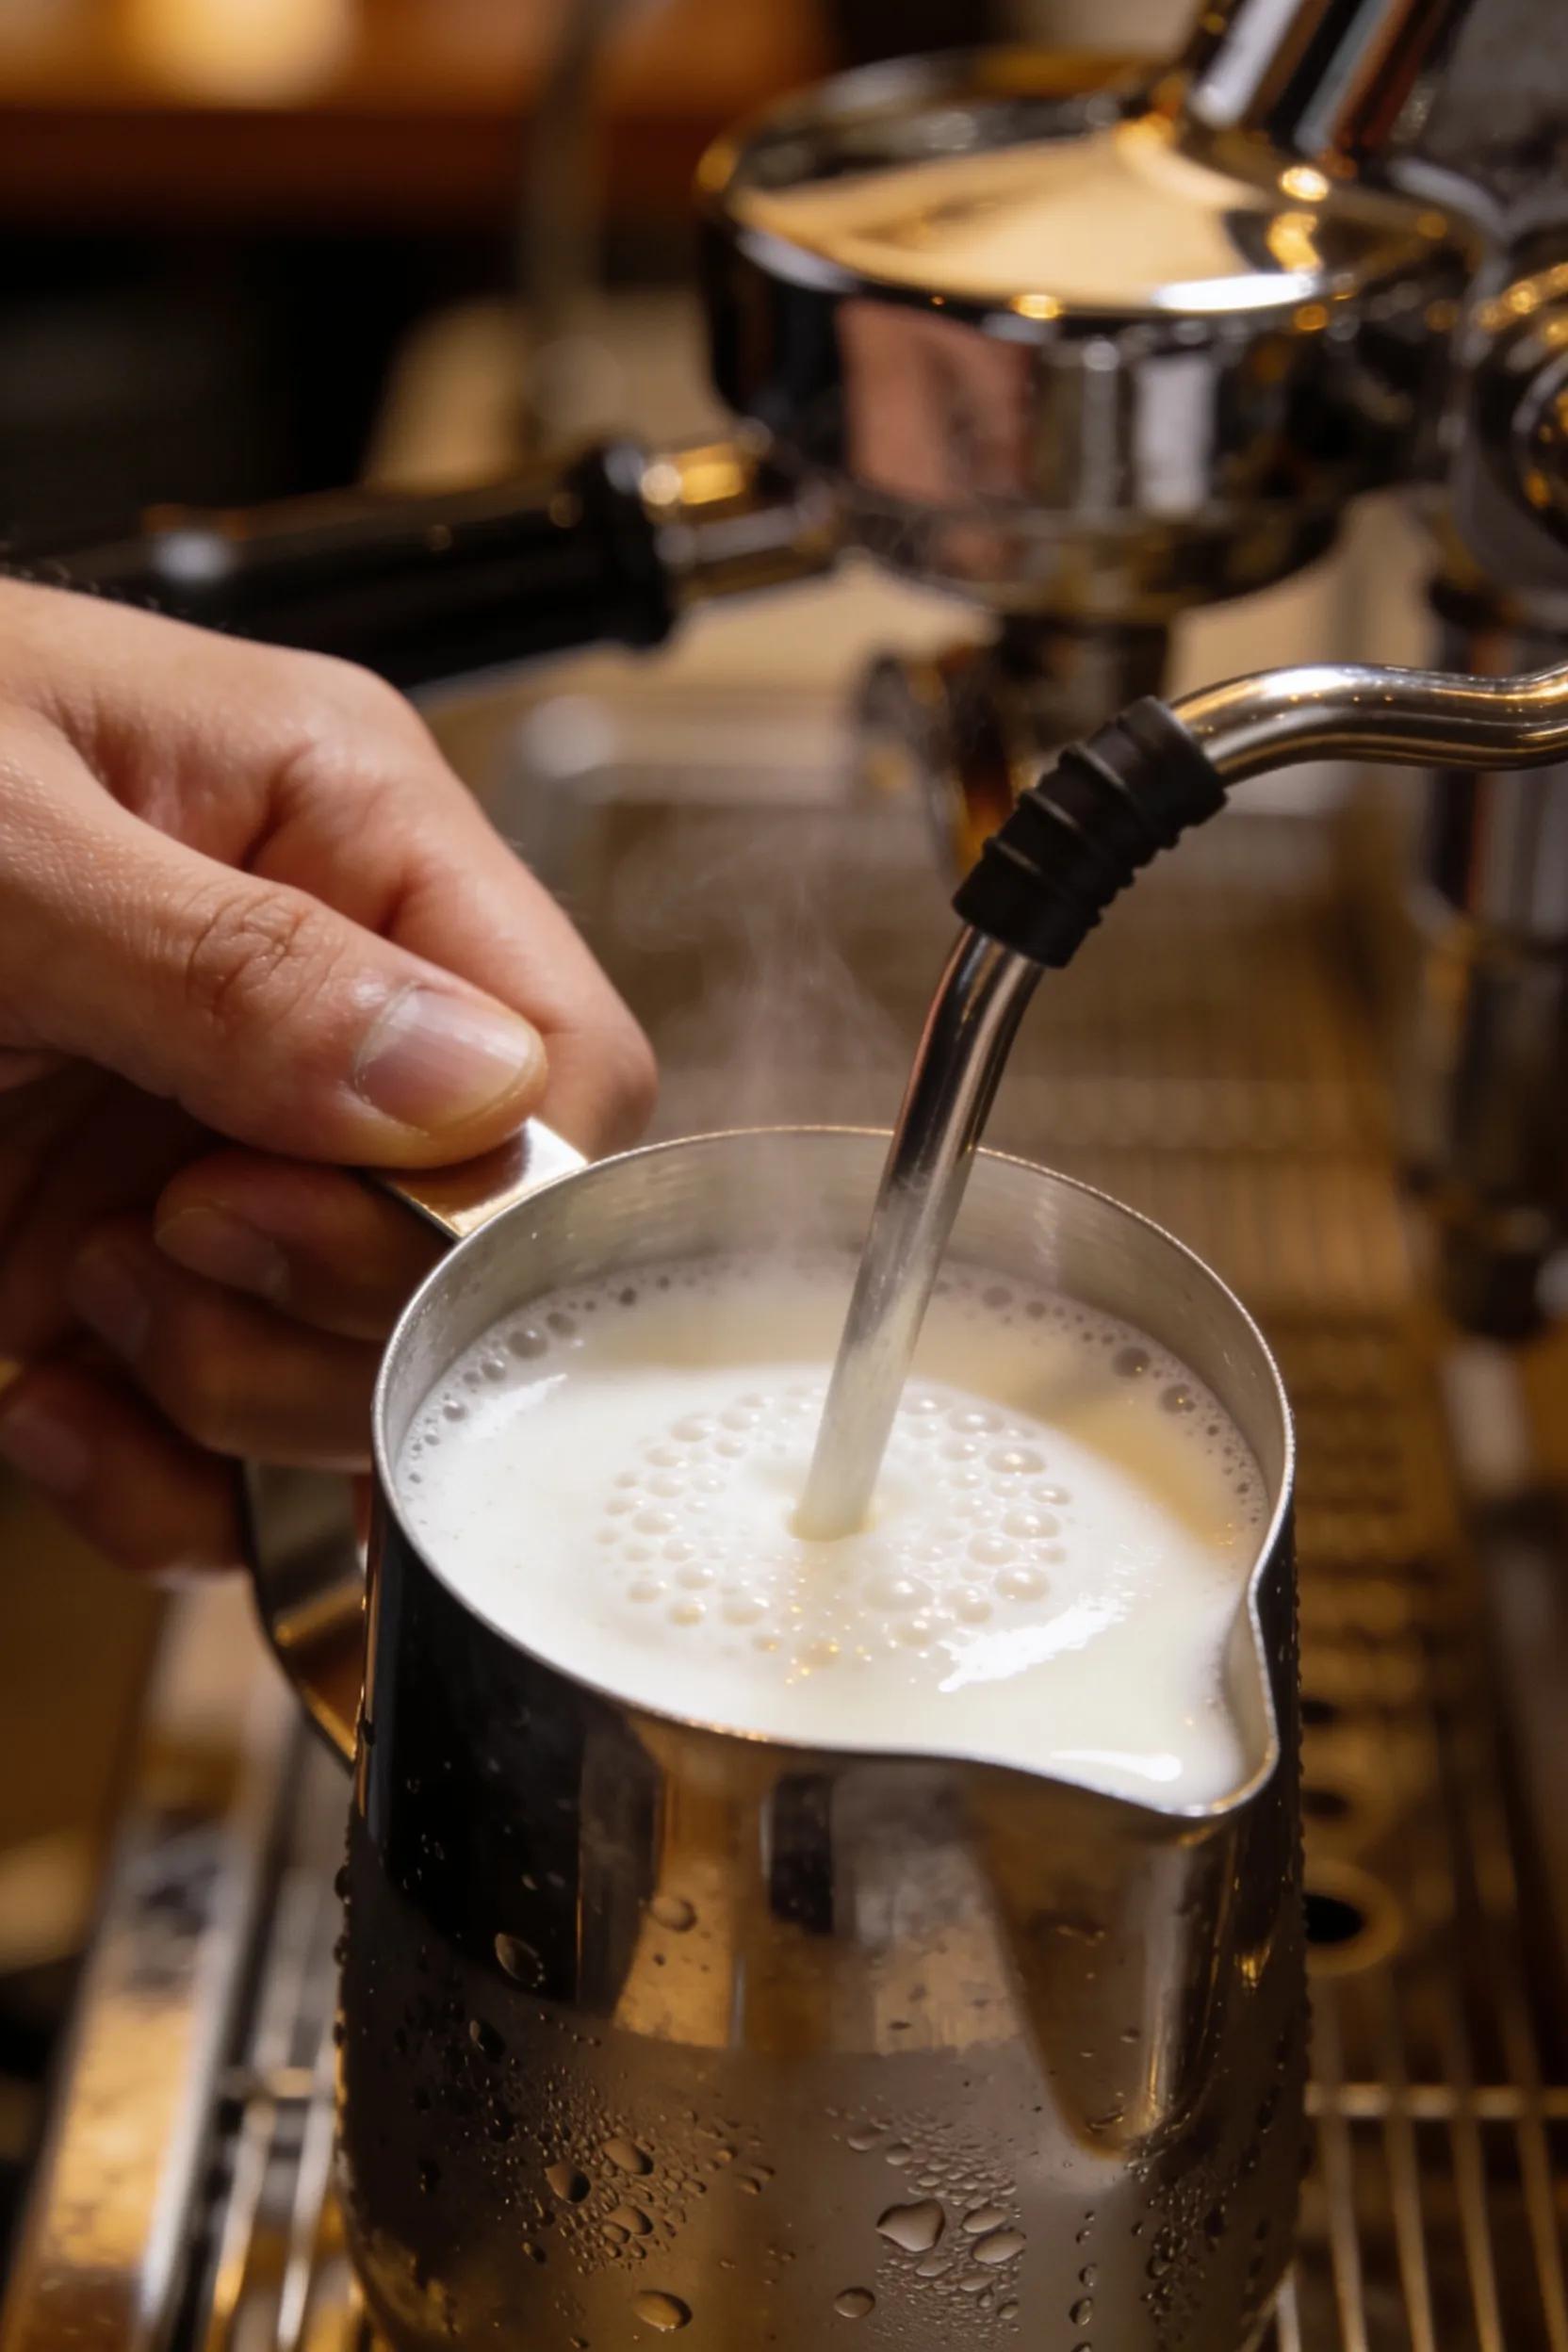
Microfoam is finely aerated milk with uniform, velvety bubbles that integrate seamlessly into espresso, creating a cohesive canvas for pour techniques and preventing design break-up. Introducing steam slowly into cold milk denatures proteins and disperses air, resulting in a glossy, ribbon-like texture that highlights contrast and sustains crisp patterns. Practically, microfoam preserves the symmetry of a tulip or rosetta by resisting separation during the pour.
Smith, A., Journal of Culinary Science (2022)
[The Science of Milk Frothing]
Research indicates that the creation of microfoam, essential for latte art, relies on the denaturation of milk proteins through the introduction of steam. This process results in the formation of small, uniform bubbles that contribute to the velvety texture and stability of the foam, allowing for the creation of intricate designs. The temperature of the milk and the technique used in steaming are critical factors in achieving the desired microfoam consistency.
This research supports the article’s emphasis on the importance of microfoam and proper steaming techniques for successful latte art.
Which Tools Are Essential for Creating Stunning Latte Art?

Creating consistent latte art requires an espresso machine with a controllable steam valve, a precision grinder for uniform crema, and a well-designed milk frothing pitcher for controlled pours. These three tools form the core toolkit enabling repeatable temperature control, microfoam quality, and pour accuracy.
Espresso machine with adjustable steam pressure
Burr grinder offering fine and consistent particle size
Stainless steel pitcher with pointed spout and comfortable handle
A seamless interaction among these tools ensures each pour builds on a solid foundation, preparing you to explore more advanced equipment features.
How Do Espresso Machines with Powerful Steam Wands Enhance Latte Art?
Espresso machines equipped with high-pressure steam wands produce consistent, high-velocity steam that denatures milk proteins more efficiently, embedding micro-bubbles and achieving stable microfoam. Adjustable steam pressure and temperature controls enable precise texturing for different milk types, while a well-insulated boiler maintains consistent steam output. This level of control yields fine-textured milk that pours smoothly without large bubbles, enhancing pattern detail and durability.
How Can Beginners Learn Basic Latte Art Designs?
Basic latte art designs introduce home baristas to simple pour mechanics and visual strategies, building confidence through patterns like hearts, tulips, and rosettas. Mastering these foundational shapes establishes muscle memory, refines milk-espresso integration, and sets the stage for more intricate free-pour techniques.
What Are the Step-by-Step Instructions for Pouring a Heart Latte Art?
Pull a 1–1.5-ounce shot of espresso with creamy crema.
Steam 4–6 ounces of whole milk to 55–60 °C with a whirlpool motion.
Begin pouring from 1 inch above the cup’s edge to mix milk and crema evenly.
Lower the pitcher spout to cup level and center the pour, creating a white circle.
Once the circle fills, draw the pitcher back in a quick motion to form the heart’s tip.
Perfecting heart pours lays the groundwork for layered patterns like tulips and rosettas.
How Do You Create a Simple Tulip Latte Art Design?
Pour a small heart at the cup’s center as in step 3 above.
Move the pitcher back and pour a slightly larger heart above the first.
Repeat for a third heart, aligning each shape vertically.
Finish with a swift pull-through to sharpen the design’s stem.
What Is the Rosetta Latte Art and How Can Beginners Master It?
Start with a steady spiral pour from 1 inch above, moving the pitcher in a slight side-to-side motion.
Maintain a consistent pour speed to form parallel lines of microfoam.
Lower the pitcher spout near the cup surface as the leaf forms.
Pull the stream through the center to define the stem, completing the pattern.
Rosetta practice solidifies your ability to modulate wrist movement and flow rate.
What Common Mistakes Should Beginners Avoid When Pouring Latte Art?
Pouring too fast, which breaks crema and causes large bubbles.
Holding the pitcher too high, leading to weak contrast and splashing.
Incorrect milk temperature, resulting in overly thin or thick foam.
Uneven pitcher tilt, which skews pattern symmetry.
Avoiding these errors accelerates learning and leads to cleaner, more defined art.
What Advanced Latte Art Techniques Can Elevate Your Espresso Creations?
Advanced latte art techniques combine intricate pours, multi-layered designs, and alternative milks, expanding creativity and visual complexity. Mastery of free-pour control, troubleshooting finesse, and adaptability to plant-based milks enables baristas to craft signature patterns that stand out.
How Do You Master Free Pour Latte Art for Complex Designs?
Practice smooth lift-and-lower motions to shape petals and hearts seamlessly.
Vary wrist speed to modulate line thickness and branching angles.
Combine multiple pattern layers—hearts, rosettas, ribbons—into cohesive designs.
Consistent microfoam and steady hands allow fluid transitions between elements.
What Are Effective Troubleshooting Tips for Common Latte Art Problems?
Many latte art issues stem from crema breakdown, inconsistent foam, or pouring errors. The table below identifies frequent problems and solutions.
Resolving these core issues refines your technique and supports advanced design stability.
How Can You Create Latte Art Using Alternative Milks Like Oat or Almond?
Alternative milks demand modified steaming and pouring strategies due to lower protein content:
Oat milk benefits from 58–62 °C steaming and slightly faster pours to prevent separation.
Almond milk requires gentler aeration and minimal steam time to avoid curdling.
Combining a dash of whole milk can enhance your almond or oat blend for improved foam stability.
Adapting temperature, aeration rate, and pour timing ensures clear patterns with plant-based alternatives.
Which Equipment Is Best for Achieving Professional Latte Art Results?
Selecting top-tier equipment with precise controls and robust components directly impacts latte art quality, enabling baristas to reproduce café-level patterns consistently and efficiently. Check out our sponsor, www.1st-line.com for authentic espresso machines.
What Are the Best Espresso Machines for Latte Art and Their Key Features?
High-performance machines for latte art combine stable boiler systems, precise temperature management, and powerful steam wands.
These configurations deliver unwavering steam pressure and shot consistency, elevating your latte art performance.
How Does Coffee Grinder Quality Impact Espresso Crema and Latte Art?
A precision grinder produces a uniform particle distribution, promoting even extraction and rich crema necessary for stable microfoam integration. Fine adjustment mechanisms prevent channeling and support bold contrast in pour patterns. Consistency in grind size directly correlates to crema thickness and design clarity.
What Should You Look for in Milk Frothing Pitchers for Latte Art?
Choosing the right pitcher maximizes control over foam texture and pour accuracy.
A pitcher tailored for latte art enables deliberate microfoam flow and crisp design edges.
How Do Steam Wand Types Influence Milk Frothing and Latte Art Texture?
Manual pivot wands require skill to position the tip, offering nuanced control over aeration and whirlpool; automatic steam arms deliver consistent air injection but may limit fine-tuning. Choosing a wand with adjustable steam valves lets you customize foam density and swirl intensity, directly affecting pattern detail and microfoam sheen.
How Do You Perfect Milk Frothing Techniques for Consistent Latte Art Microfoam?
Consistent microfoam underpins every latte art design by ensuring uniform bubble size, optimal viscosity, and sustained contrast with espresso, enabling predictable and lasting patterns.
What Are the Step-by-Step Milk Frothing Techniques for Velvety Microfoam?
Purge steam wand to eliminate residual water.
Position tip just below the milk surface to introduce fine air.
Submerge wand deeper to create a centrifugal whirlpool.
Monitor temperature with a thermometer until reaching 55–60 °C.
Finish with a gentle swirling motion to collapse larger bubbles.
Adhering to these steps produces microfoam ideal for all latte art pours.
How Does Steam Wand Positioning Affect Milk Texture?
Precise wand placement at a 15–30° angle just below the surface creates controlled air incorporation, while deeper submersion maintains circulation without large bubbles. Adjusting the angle and depth during steaming balances aeration and emulsification, ensuring consistent viscosity for pattern stability.
What Are Tips for Frothing Milk with Different Types of Milk?
Milk varieties require distinct approaches:
Whole milk yields stable foam with moderate aeration and whirlpool.
Low-fat milk needs slightly less steam time to avoid over-aeration.
Oat milk benefits from longer gentle steaming to develop creaminess.
Almond milk demands lower temperature and minimal air for smooth texture.
Tailoring steam pressure, duration, and tip depth to each milk type secures optimum microfoam characteristics.
What Are the Best Practices for Practicing and Improving Latte Art Skills at Home?
Regular, deliberate practice using structured methods refines technique, builds muscle memory, and accelerates progress toward professional-level designs without overusing costly milk.
How Can You Practice Latte Art Without Using Milk?
Alternative media like warm water mixed with dish soap or non-staining paint in a pitcher simulate pour dynamics at minimal cost:
Soap solution replicates viscosity for heart and tulip motions.
Food-safe paint allows visual feedback on flow patterns.
Dry practice with an empty pitcher hones wrist angles and movements.
These methods let you focus on pour mechanics before returning to real microfoam.
What Are Pro Tips for Improving Pouring Mechanics and Design Precision?
Enhance your technique with these pointers:
Keep your wrist steady and pivot from the elbow.
Use a gentle lift and tilt to modulate stream thickness.
Practice mirror-image pours to reinforce muscle memory.
Record video of your pours to review flow fluidity and angle.
Applying these methods sharpens control, leading to consistently crisp patterns.
How Can Home Baristas Track Progress and Troubleshoot Their Latte Art?
Documenting your sessions and analyzing results accelerates improvement:
Photograph each pour from above to compare symmetry.
Note steam pressures, milk temperatures, and cup size.
Create a progress log tracking design success rates.
Review troubleshooting table entries to address persistent issues.
Systematic tracking builds self-awareness, guiding targeted practice and equipment adjustments.
What Frequently Asked Questions Do Latte Art Beginners Have?
Latte art beginners often wonder how to start simple pours, choose the best milk, and diagnose common issues—questions that reveal core challenges and shape effective learning pathways.
How Do You Make Latte Art for Beginners in Simple Steps?
Start by pulling a balanced espresso shot, steaming milk to a glossy microfoam, pouring from a height to blend layers, lowering the pitcher to build pattern contrast, and finishing with a smooth pull-through. These concise steps form a reliable template for heart and tulip designs.
What Kind of Milk Is Best for Latte Art and Why?
Whole milk is best for latte art because its ideal protein and fat content produce stable microfoam with a creamy texture, supporting clear contrast and lasting patterns. Oat milk serves as the top non-dairy alternative due to its natural sweetness and effective foam retention.
Can You Do Latte Art with Any Espresso Machine?
Yes, you can create latte art on most machines, but quality varies—machines with precise temperature control, adequate steam pressure, and consistent boiler performance yield superior microfoam and crema essential for pronounced designs.
Why Is My Latte Art Not Working and How Can I Fix It?
Latte art fails when foam lacks stability, crema is too thin, or pour technique is inconsistent. Fix this by adjusting steam wand position, refining grind size for richer crema, and practicing steady pour heights—approaches that restore contrast and pattern integrity.
Mastering these elements equips you to refine every core aspect of latte art and achieve café-quality results at home. Elevate your coffee routine and unlock new creative possibilities by exploring premium espresso machines, grinders, and accessories designed to support advanced pouring techniques at 1st-line.com.
Your journey from foundational principles to complex free-pour patterns is complete with practiced microfoam, precise equipment choices, and structured troubleshooting—transforming each espresso creation into a stunning visual and sensory experience. Learn more about mastering the art of frothing milk!